sheilaskitchen

Ideas, recipes, menus for the busy family.

Frozen Yogurt Bites May 22, 2012

Filed under: Breakfast,Freezer cooking — TeamModine @ 3:39 pm
Tags: , ,

We’ve all seen the Yogurt bites on Pinterest that use the ziploc baggie to make little dots. I made some of those today, but I used a “baby” spoon instead it worked well.


Recently I found Yogurt Bites in the freezer section at the grocery store that was frozen yogurt “rolled” in granola. They were delicious! I figured I could duplicate them.


The first time, my mini-muffin tin was packed for our move and I used my regular size muffin tin. It worked, but they were too big. So, I unpacked my mini-muffin tin and gave it another try.

Here’s the ingredients I used:


I didn’t have as much granola as I thought, so I decided to add a little graham cracker crumbs.


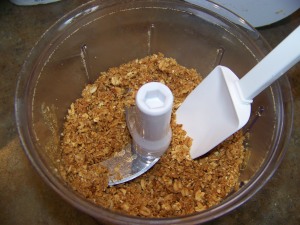
I used my Manual Food Processor to “chop” the granola into a finer texture.


Then I added the graham crackers and the melted butter. It made a nice “crust” consistency as if you were making a graham cracker crust.


Because I didn’t have much granola, I only made 8 bites. I would have used my mini-tart shaper, but it’s packed and in Moscow. 🙂


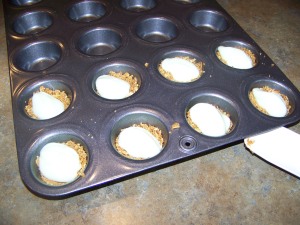
I used my small scoop to put the yogurt into each “crust.”


All 8 filled. I could have filled another 4 cups from the regular sized yogurt cup I was using.


Then I topped each one with the remaining granola mixture.

Here’s all the tools I used to make them:


Into my freezer to set up.


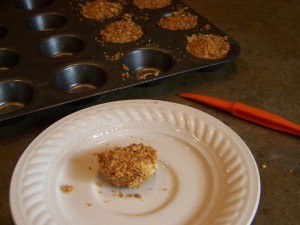
The finished product. I use my Citrus peeler to “pop” them out of the muffin tin. (I use that trick for just about anything I make in any of my muffin tins when I don’t use a cupcake liner.)

They taste close to the original. The original stays “creamier” than mine, but it will work. I have a feeling I will be making a lot of these this summer.


Marathon Freezer Cooking May 17, 2012 May 17, 2012

I’ve been working on staying caught up with the Money Saving Mom’s challenge to fill my freezer in May. She is doing one recipe each week day. I tried to do that, but I found that I do best when I can do a few recipes at once. I feel like I get more accomplished when I can multitask. HOWEVER, I almost bit off more than I could get done today.

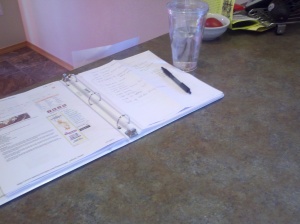
I started off with a list of each step so I wouldn’t forget anything and all my recipes together.


Here’s what I did:

I started cooking the beans to make my own refried beans in my 12 qt stockpot. I used my clock/timer to make sure I didn’t forget about them and overcook. And I used one of my bamboo spoons to stir periodically. Here’s the recipe I used: http://www.tammysrecipes.com/homemade_refried_beans

I used 3 cups of dry beans and adjusted the other ingredients accordingly. I didn’t use ground coriander or fresh cilantro. They were delicious! They made enough for both recipes I needed them for plus a little leftover.

Then I started cooking the chicken I needed for the Southwest Roll Ups and the BBQ Chicken pockets in my Deep Covered Baker. I used my Chef’s Tongs and Digital Pocket Thermometer to make sure everything was cooked through. The I used my Salad Choppers to chop up the chicken quickly.
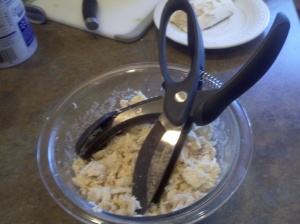


I started the Pizza Pocket & BBQ Chicken Pocket dough. I used my Adjustable Measuring Spoons, Small Mix ‘n Scraper, Measuring Cups, Italian Seasoning and Smoky Applewood Rub.

Here’s the recipe I used: http://amysfinerthings.com/pizza-pockets  I made the first batch according to the recipe. The second batch I replaced the Italian Seasoning with the Pampered Chef’s Smoky Applewood Rub.

For the filling I used my 5″ Santoku forged cutlery, Bar Board, Bamboo Spoon and Medium Stainless Steel Scoop.
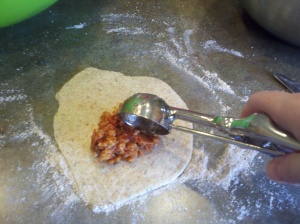


The scoop was fabulous to keep everything equal when I filled the pockets.


I only used the hamburger meat, pepperoni & pizza sauce for the pizza pockets. I added to cheese to some for those of us who can eat cheese. For the BBQ chicken, I used a pound + of cooked chicken and added bottled bbq sauce to make it saucy, but not too wet. I added cheese again for those of us who could have cheese.
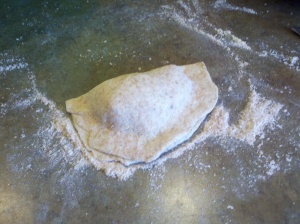


I baked them on my Medium Sheet pan and some other pans I have. Then I put them on cold pans to go in my freezer to freeze them individually before I put them in zip bags for storage.

When the beans were done cooking, I mashed them in my 12″ skillet. I tried to mash them with my Mix ‘n Chop. It worked ok, but I had a lot to do and I knew with the smaller surface it would take a while. So I tried my Mix ‘n Masher next and it worked really well for how much I need to mash.


I used my Scoop ‘n Drain to get the beans out of the pot and into the skillet.


I used part of the beans for this recipe: http://amysfinerthings.com/brown-bag-burritos. I added the cheese after I had made some for my daughter that is dairy free. Then the other batch of beans I used in this recipe: http://moneysavingmom.com/2010/04/southwest-roll-ups-recipe.html. Again, adding the cheese after I had made the dairy free batch. I used my stainless mixing bowls to make the fillings.

I used my 2 cup prep bowl and leakproof glass container to store the leftover fillings. I had a little of all but the southwest roll ups. We’re going to use the fillings on baked potatoes or toast or salad for dinner.

It took me 4+ hours to do it all. I had estimated 3+ hours. I was going to take a break and finish up the burritos and roll-ups, but I decided to push through and get it done at once. I’m so glad I got so much accomplished.


Next time, I will make the pockets and cook the beans at the same time, but I will plan to make the burritos and roll-ups the next day.

My family is super excited to give these recipes a try and I’m sure I will make them all again. They were all relatively easy, but it was a learning curve since it was the first time I made all 4 of them.


Fajitas September 17, 2011

This is a great recipe to prep and then freeze for another time. You can do several packets at once.

1½ # Round Steak or Chicken

1-2 limes

2-3 cloves garlic

2 Tbsp Pampered Chef Southwest Seasoning

Salt & Pepper


Cut limes in half and press juice into bag using Citrus Press. Add garlic, using Garlic Press. Using Adjustable Measuring Spoon add Southwest Seasoning; salt and pepper. Seal bag and mix. Open and add steak/chicken, mixing to coat. Take out of freezer the evening before you will have for dinner. It will marinate as it defrosts in refrigerator for 24 hours. Grill outside or in Grill Pan.

To serve as fajitas, slice meat after cooked and serve with your favorite fixings.


Freezer cooking 8/31/11 August 31, 2011

Here’s what I made today:

Energy bites (single batch, got about 40 1 TBSP size bites.)  http://fooddoodles.com/2011/06/28/one-bowl-all-natural-no-bake-energy-bites/

Freezer friendly breakfast burritos (only made 12, but had extra egg mixture. Going to add some hashbrowns to it for dinner tonight or breakfast tomorrow.) Recipe is from www.MoneySavingMom.com.

Lemon chicken: The juice of 2 lemons, 1/3 c olive oil, 2 pressed garlic cloves and 2 Tbsp of Pampered Chef Lemon Pepper rub, mixed together in a gallon freezer bag. Then add 2# of boneless chicken. Freeze.   When we have it for dinner, I’ll thaw it in the fridge overnight and then cook in my grill pan for dinner and add either some pasta or potatoes.

Blueberry muffins, I doubled it because this recipe only makes a dozen muffins. Something happened with doubling it. I got 24 regular size and 24 mini.

https://sheilaskitchen.wordpress.com/2010/06/30/lemon-blueberry-muffins/

Enjoy!


Freezer Cooking 7/20 July 20, 2011


Finished product


So glad I’m getting back in the habit of cooking & freezing ahead of time.

I’m hoping to plan better so I can do it in an hour, but today it took me just over an hour and a half. Still totally worth my time to fix things and get them in the freezer. The great part of today was getting my 10 year old daughter in on the fun.

I made three things today: 

Freezer Friendly Breakfast Burritos (http://moneysavingmom.com/2011/05/freezer-friendly-breakfast-burritos.html) The recipe said it made 20, I got 19. It’s a really quick and easy recipe to make. My daughter chopped the onions and peppers with my manual food processor and stirred the eggs while they cooked. We also put them together in an assembly line. I put the egg mixture in the tortillas and wrapped it up in the paper towel. She wrapped it in the foil and then put it in the freezer bag. When the eggs were done, I made the first 7 without cheese for my oldest daughter who can’t have dairy. Then we added cheese for the rest of the burritos.


Pumpkin Chocolate Chip Muffins (http://moneysavingmom.com/2009/06/baking-day-pumpkin-chocolate-chip-muffins.html) Pretty straight forward recipe. It makes A LOT of muffins. I have 24 regular size and 24 mini muffins. We froze the regular size and kept out the minis for snacks this week.

All Natural No Bake Energy Bites (http://fooddoodles.com/2011/06/28/one-bowl-all-natural-no-bake-energy-bites/)  These are wonderful!!!! I doubled the recipe and use my small scoop (about 1 Tbsp) to make the bites. We got 53. I used macadamia nuts and chocolate chips for the add-ins. Even though it made a bunch, I don’t think they will last long. I will probably need to make these each week. But it was really easy, my daughter enjoyed making them with me.


My attempt at freezer cooking July 13, 2011

Filed under: Freezer cooking,Menus,Muffins/Breads — TeamModine @ 4:09 pm
Tags: ,

Ok, I thought I was going to do freezer cooking today, but it didn’t quite work out that way. It was more like cooking ahead/what we will eat now.

I had a couple of things work against me. 1. I decided to get started right at the time I needed to make lunch for the family. So I was fixing lunch for the youngest 2 while my oldest and my husband were fixing theirs and starting my cooking ahead. 2. I follow Money Saving Mom (www.moneysavingmom.com) and she used to do a whole day of freezer cooking, but has recently gone to cooking 1 hour a week for the freezer. This sounded manageable, so I thought I would give it a try. However, I did not prep anything ahead of time. I printed off some of her recipes that sounded good jumped in. 3. In the middle of this, I decided to prep tonight’s dinner and tomorrow night’s dinner, too. 

Learned my lessons. I will not start at a meal time. I will plan ahead and I will only do freezer cooking or meal prep, not both.

But here is what I got done:

1 Meal’s worth of Chicken & Bows (http://wp.me/pQCuj-1f) to put in the freezer.

1 Loaf of Banana Chocolate Chip bread. I was going to slice and freeze the slices, but the family loves it, so I don’t think it will make it to the freezer. (Next time, I’ll double it and freeze one.)

1 Meal’s worth of Quick Chicken Pad Thai (tonight’s dinner, yes I have totally rearranged this week’s menu. I’m making everything, but it has changed days.)

Prepped Chicken for Pretzel chicken tomorrow.


Money Saving Mom has quite a few breakfast items that I will try next. I think they’ll be great to try while on summer break. The ones we like, I’ll do once school starts back up since my kids all get up at different times, having things to fix individually is helpful.

So, I’m going to use the tools she has on her site and plan ahead. Then the following week, I think I will do some Pampered Chef power cooking to get some freezer meals put away. Those come in handy when life is crazy around here.